“The disc, being flat, has no real horizon. Any adventurous sailor who got funny ideas from staring at eggs and oranges for too long and set out for the antipodes soon learned that the reason why distant ships sometimes looked as though they were disappearing over the edge of the world was that they were disappearing over the edge of the world.”
– The Light Fantastic (1986), Terry Pratchett
The beginning
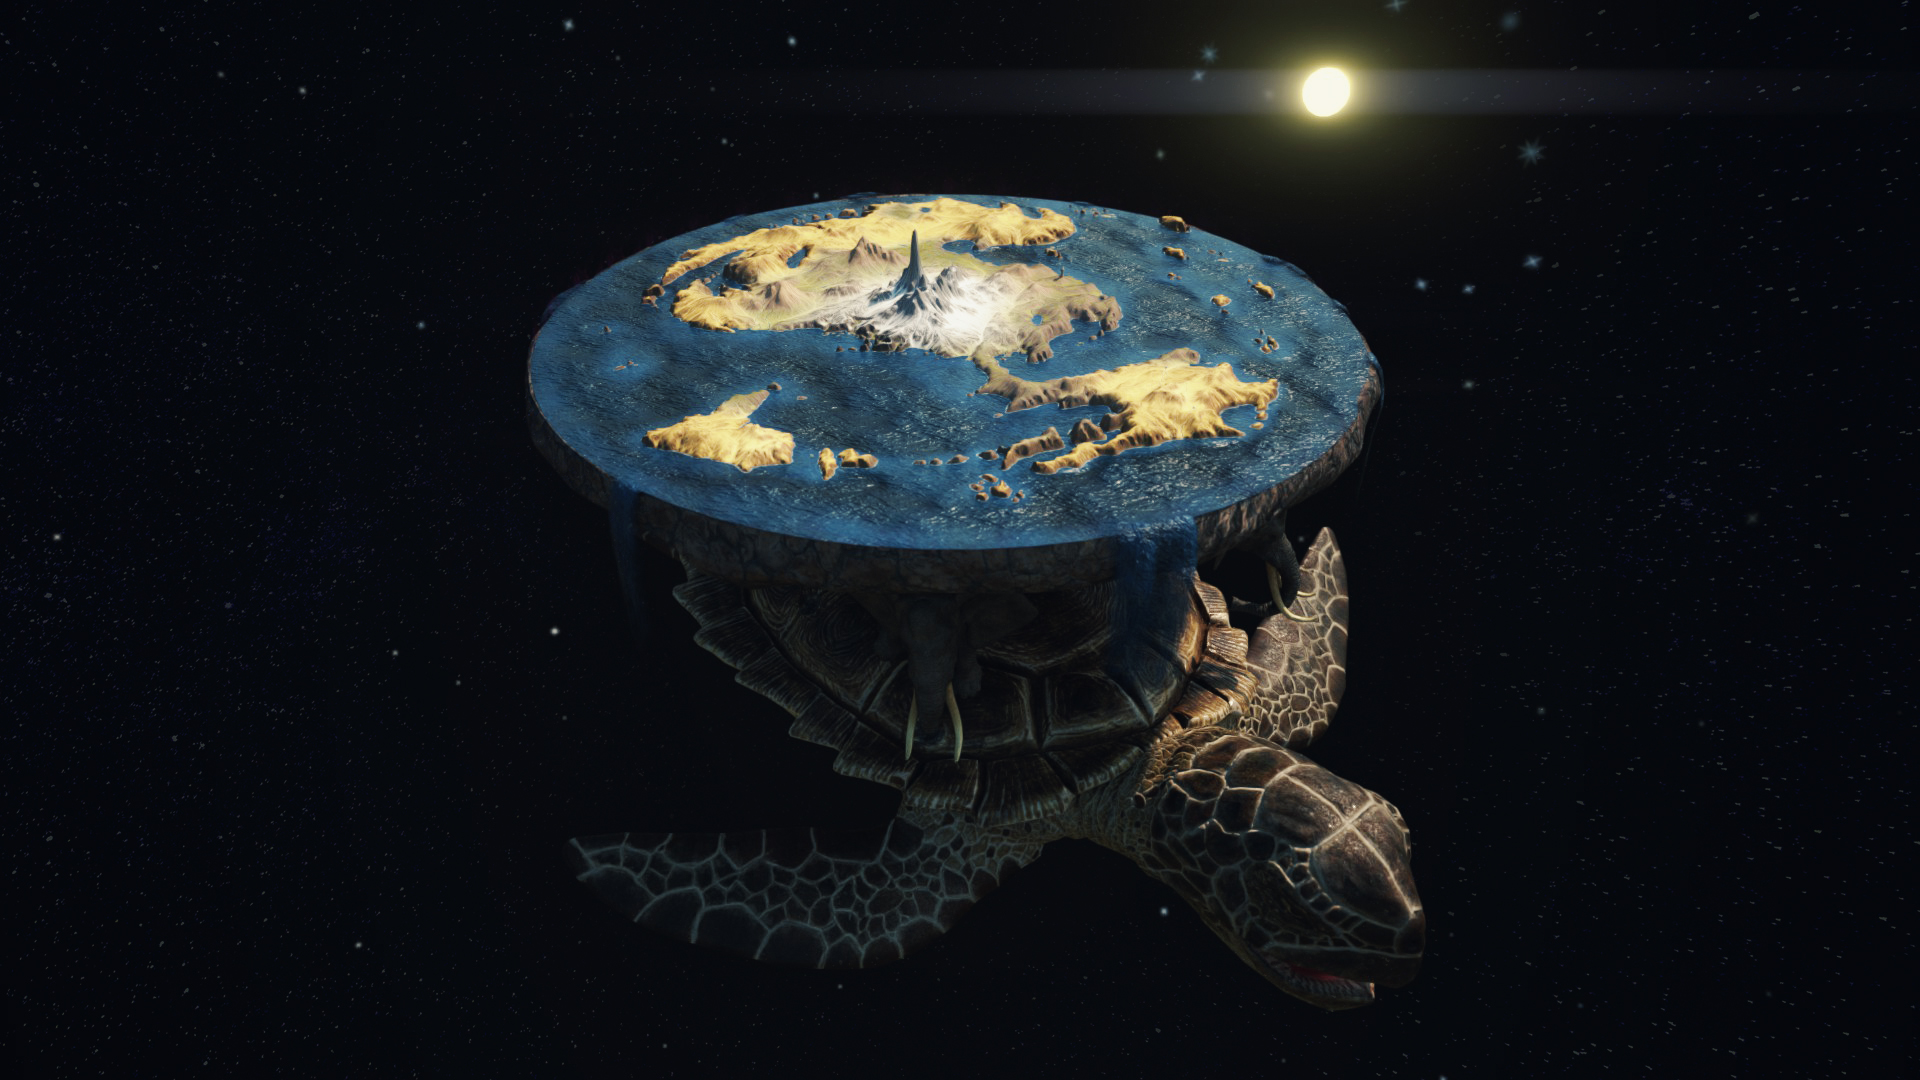
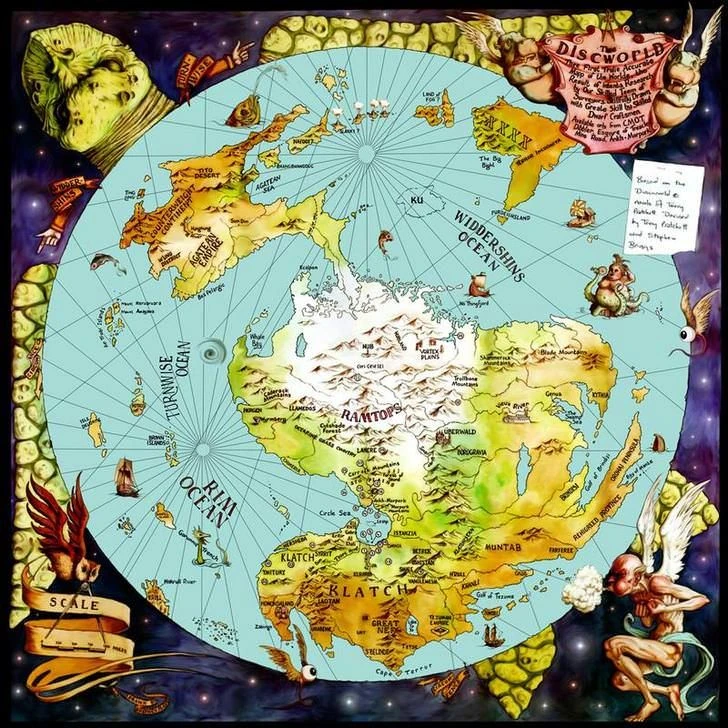
I’ve started this project from collecting references of sea turtles – The Great A’Tuin was first to model. Great help were also illustrations of Discworld itself. I wanted to check what are acceptable proportions between elements of the scene. A map attached to books featuring a top view of the world was also helpful for creating detailed terrain of Disc itself. The greatest reference of all, was a content of books, of course. Most of them starts from description of presented realm but in a different manner. As a reader, you get scattered informatio in every novel. After reading a few of them, one can have solid understanding of Discworld and how this universe works.
It was a pleasure to gather quotations and visual clues, just to merge all ot that into one solid object. To acomplish this project I used several softwares:
Blender, ZBrush, Photoshop, Substance Painter and World Machine.
In this blog post I’m describing my thought process and sharing blockers I stumbled upon.
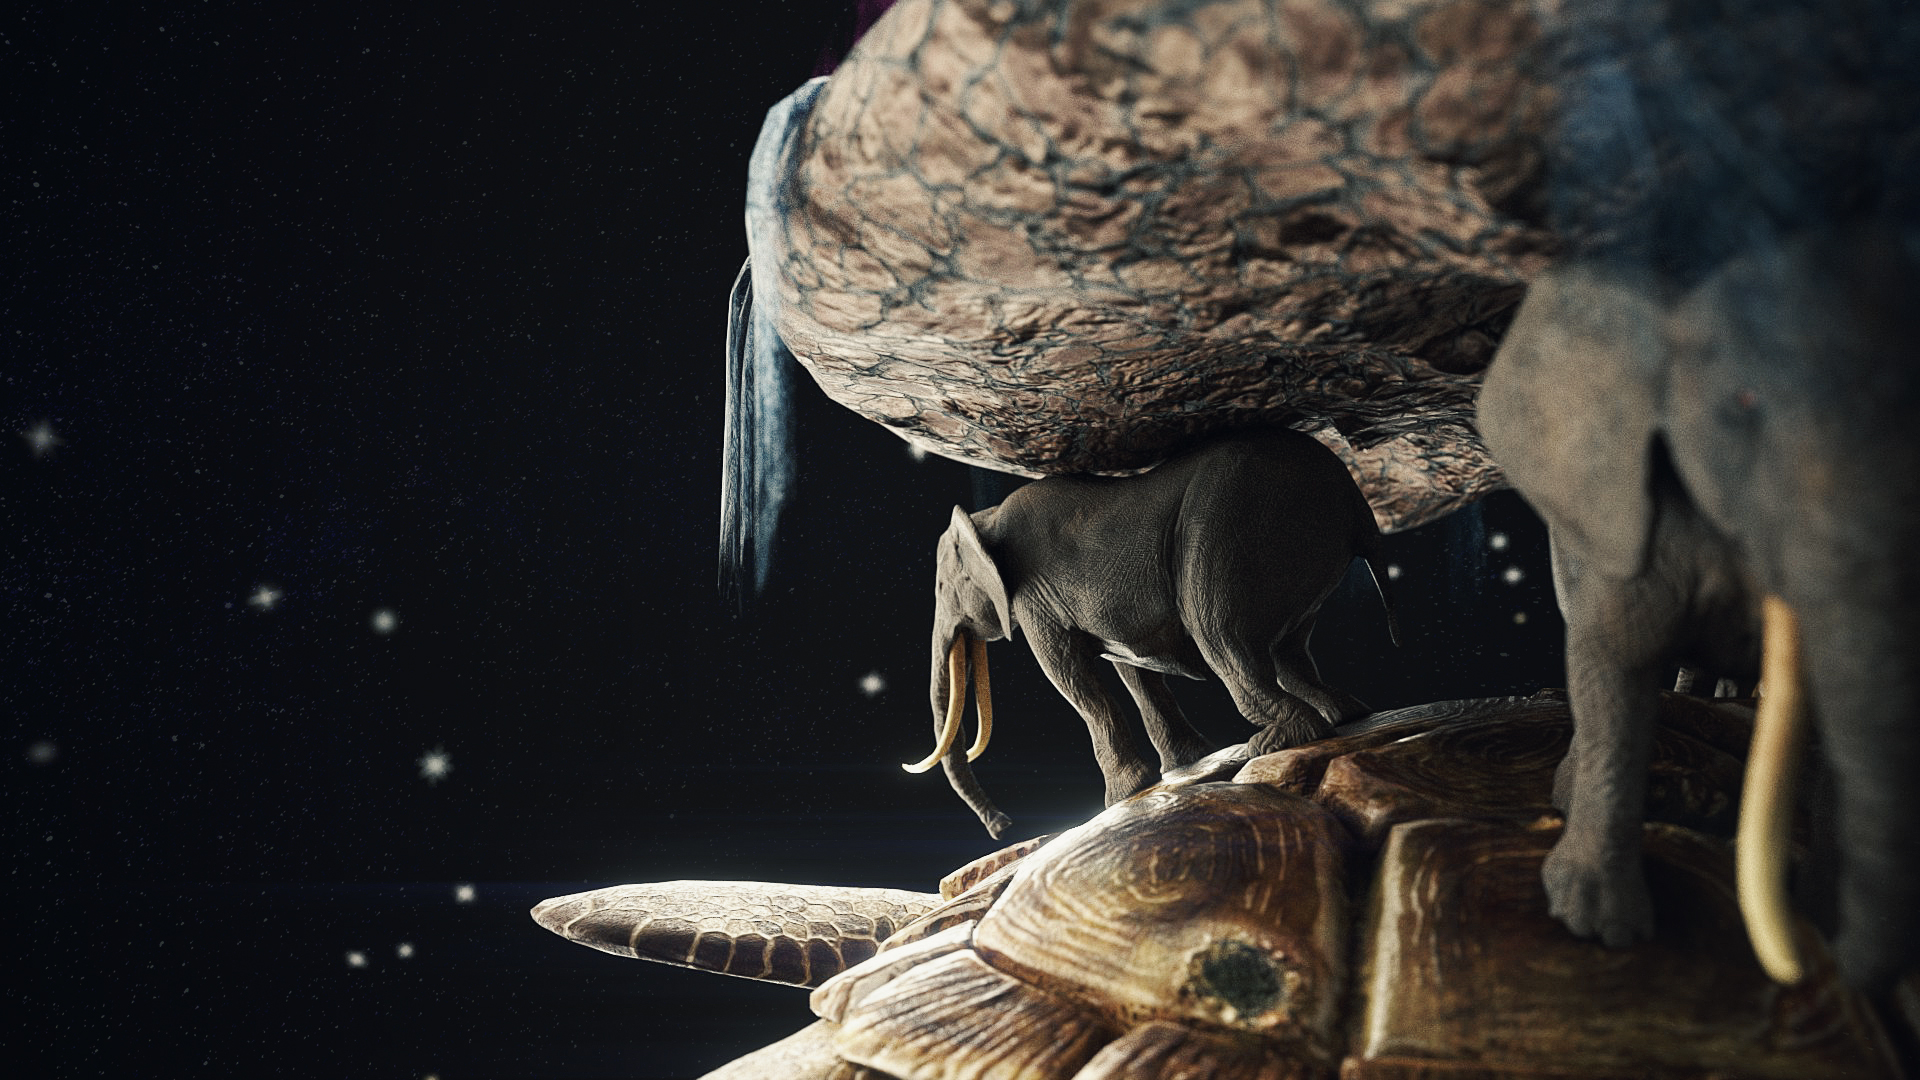
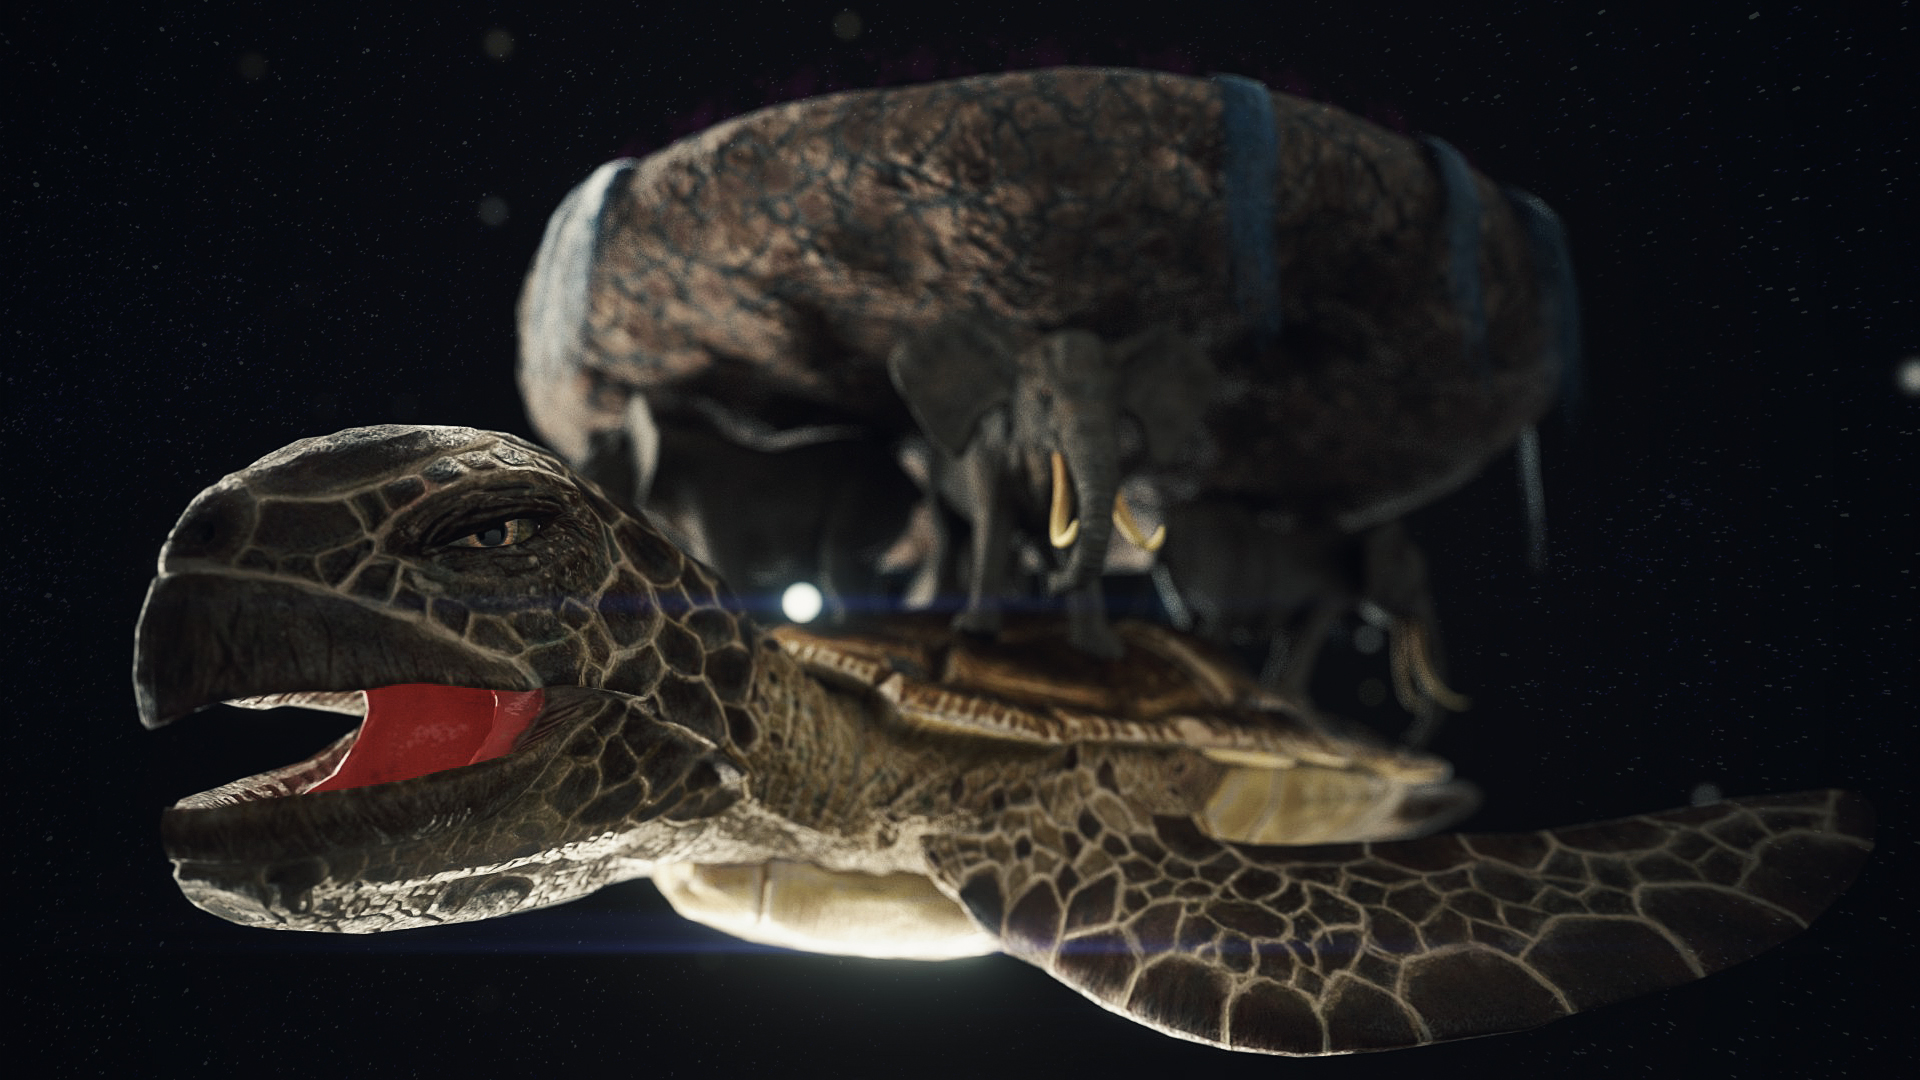
A’Tuin
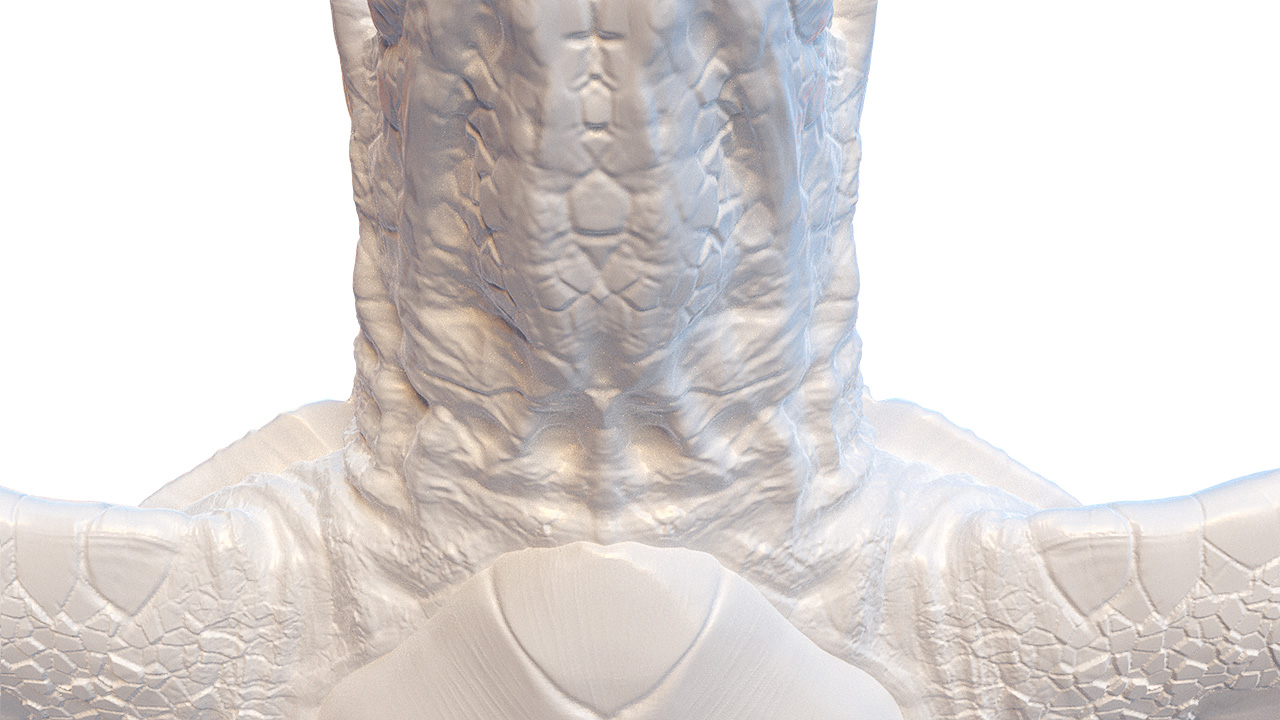
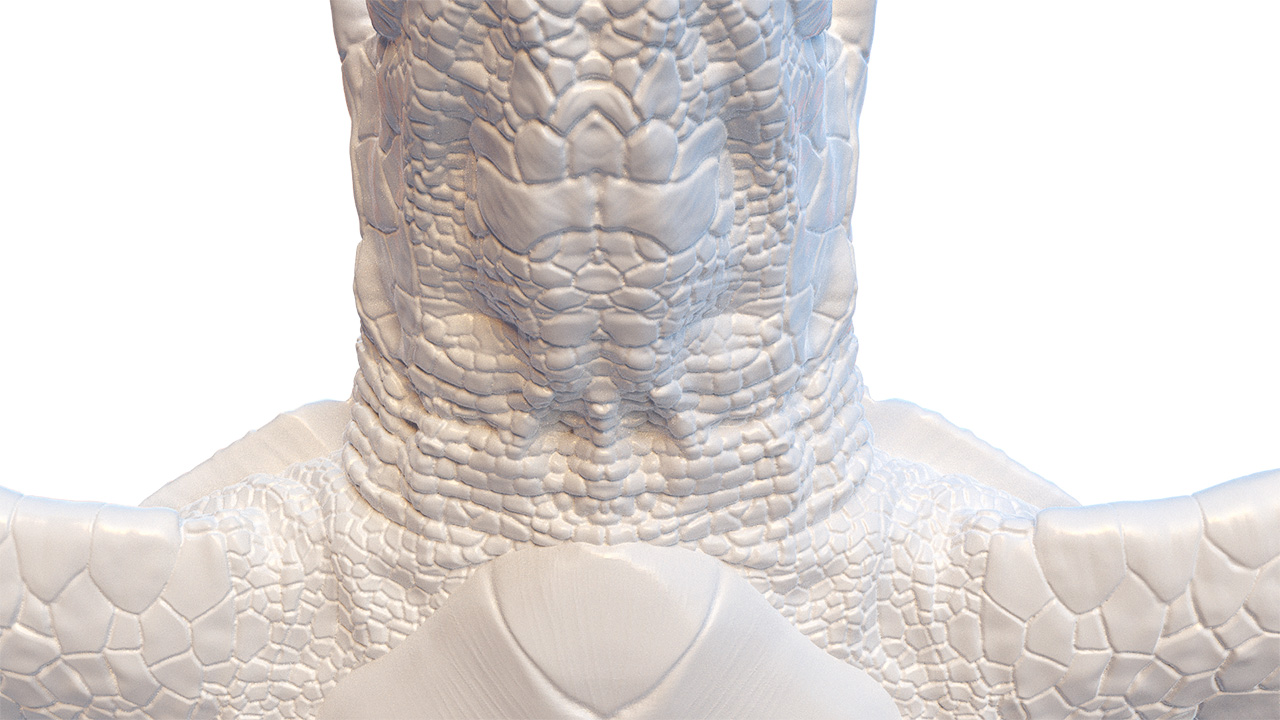
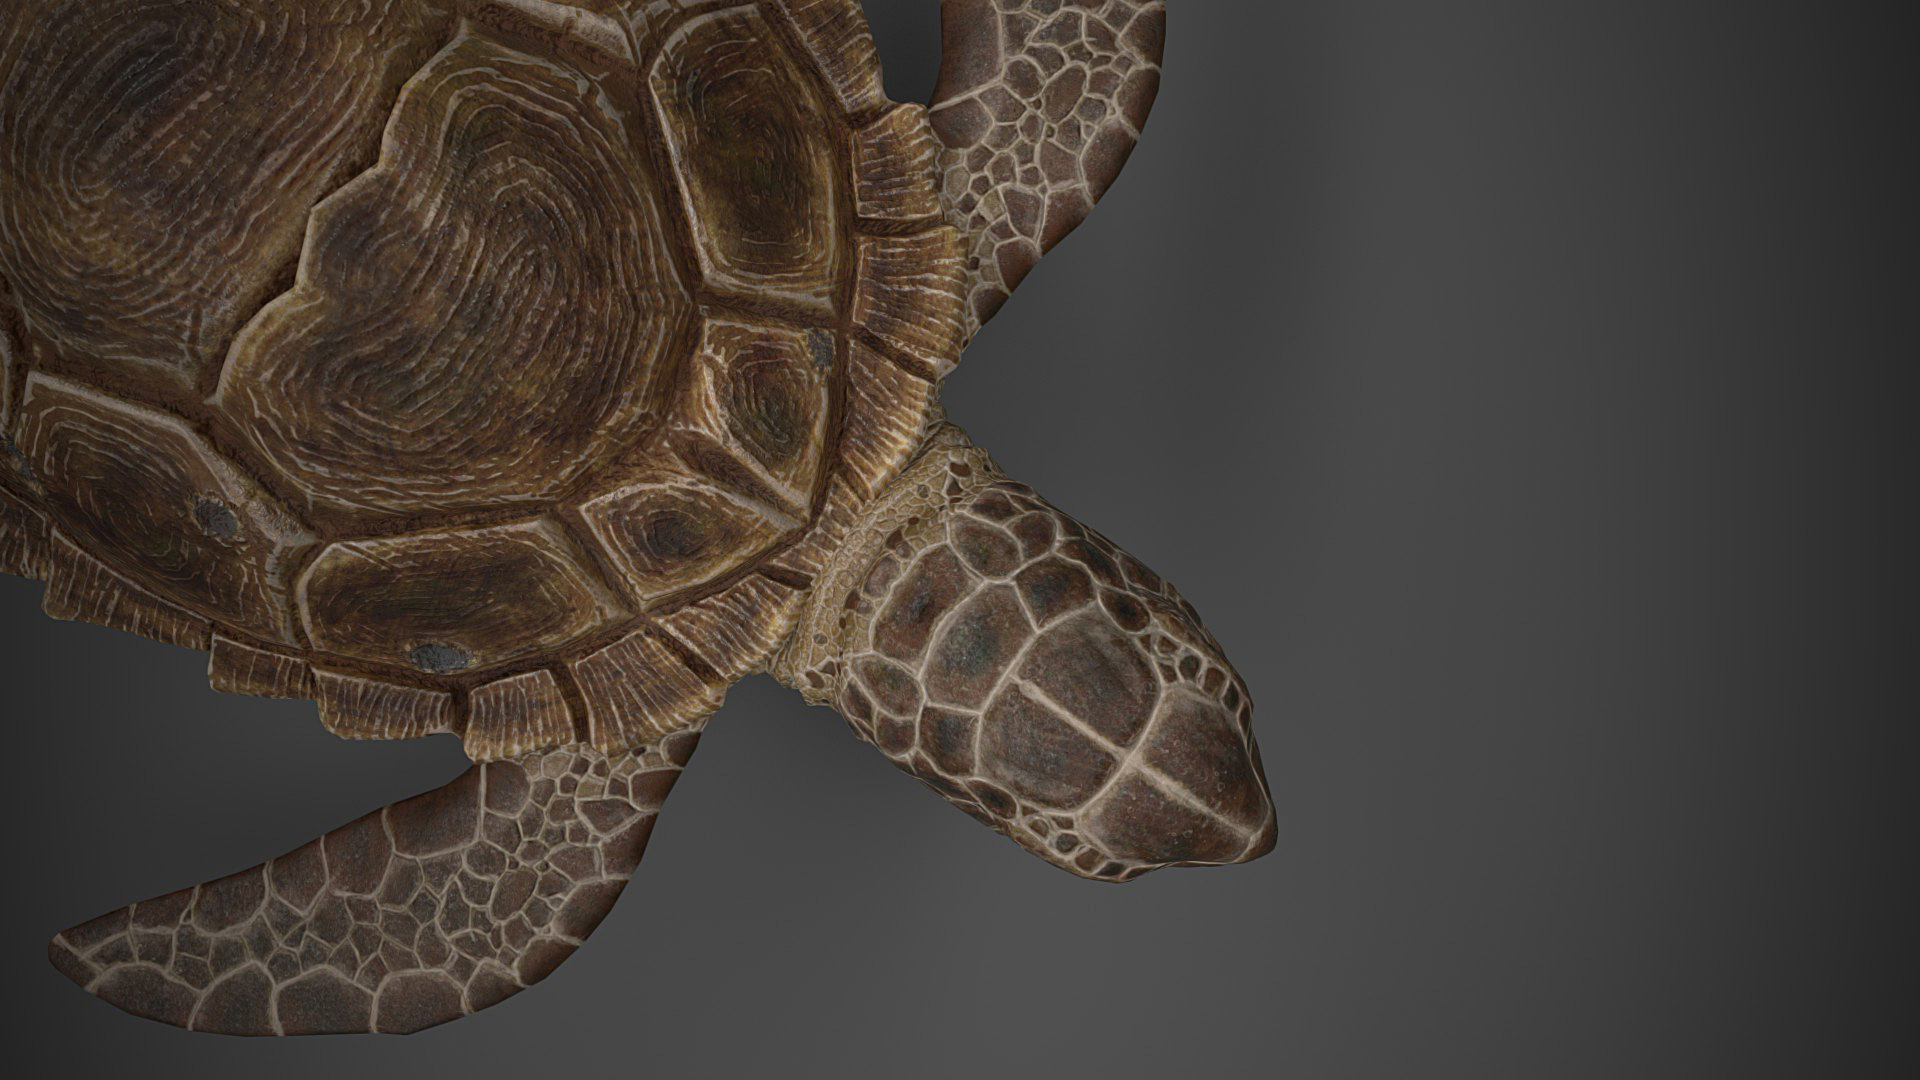
Modeling has started in Blender. There, I made base mesh for a turtle, which was exported to ZBrush. Retrospectively, I think, creating this base was a waste of time and this thought helped me to speed up my work. My favorite set contains Move, Clay Buildup and hPolish. Depending on sculpting subject, I like to use Dam Standard and Pinch (for narrow cavities) or Inflat (that saves me with thin surfaces). I sculpt using DynaMesh.
When I was happy with results, I took a break. After I got back, it struck me that skin doesn’t look as good as I thought it does…
For creating details, I have used vornoi texture which was supposed to simulate cracks on skin. Unfortunately, this process gave me awfully looking results. I took two deep breaths and decided to do these details by hand. It took me some extra hours to gather references and polish skin, but when I finished it, I knew this was the right call.
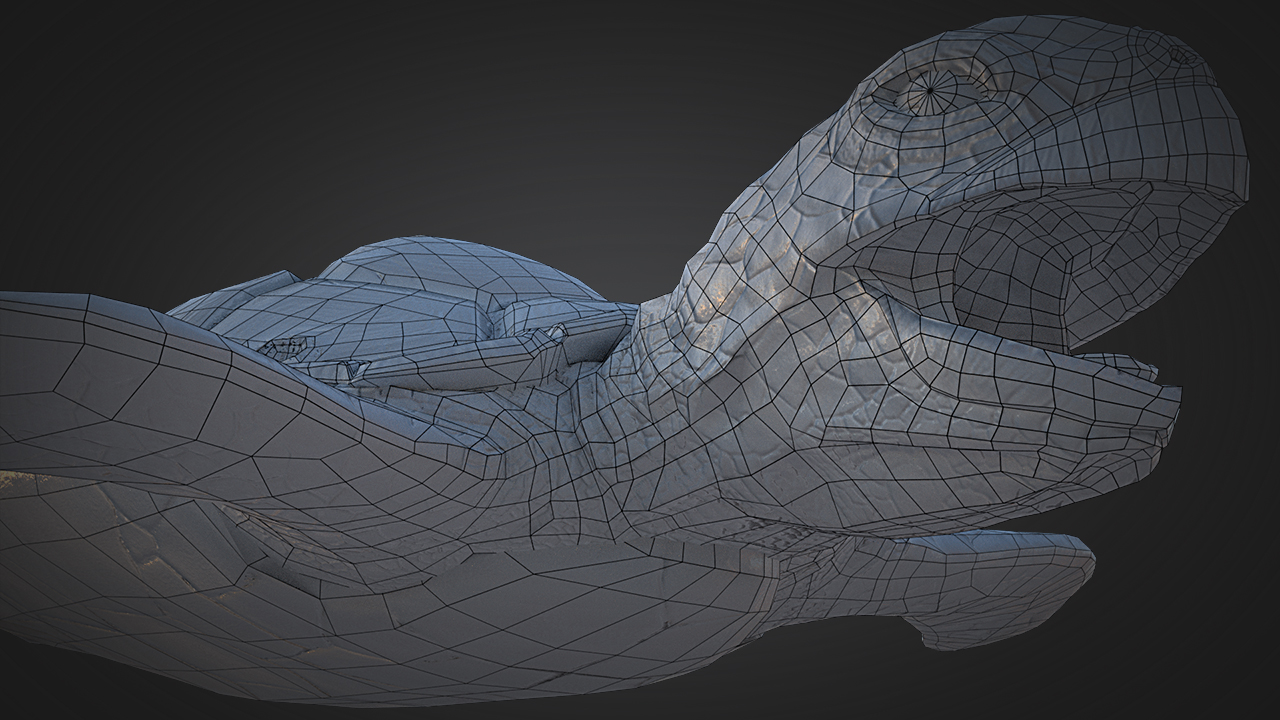
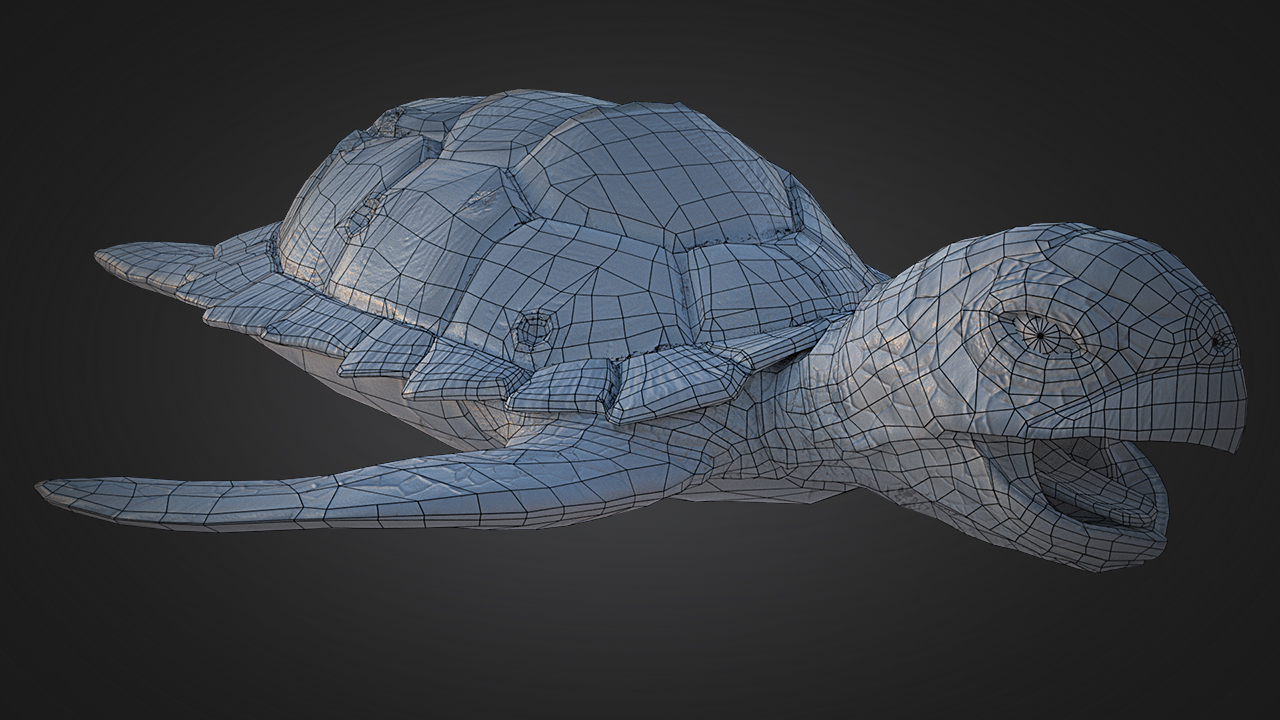
I did retopology in Blender. Created UVs, and baked details to low poly mesh. From now, I could proceed to the next stage.
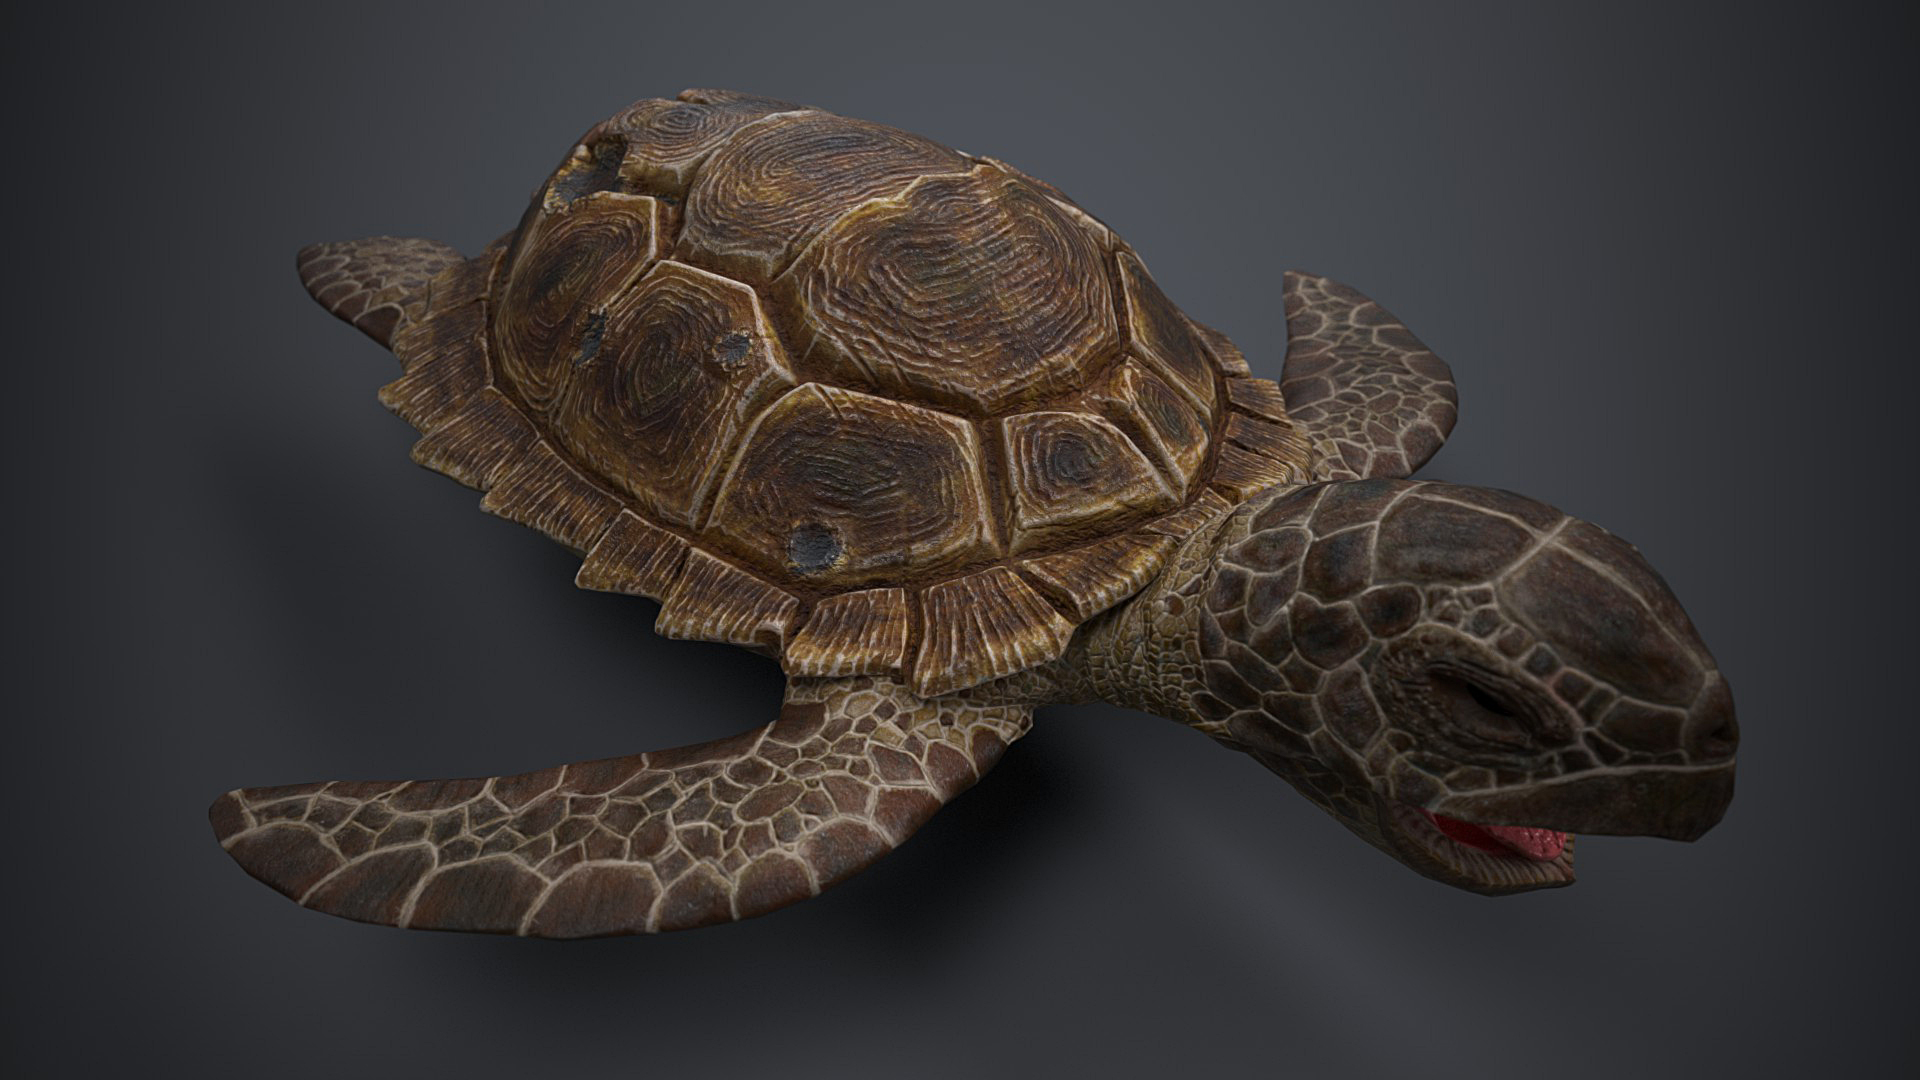
Time for texturing! My software of choice for this is Substance Painter. I’m starting from baking basic maps and generating masks for materials. When I’m producing those materials, I try to get best results with procedural maps, and then add final touches with regular painting brushes. Base materials gave me proper values for Roughness, Height and Metallic, while Albedo was later strongly over painted. At this point, I step back from Great A’Tuin and let it rest. He (or she) doesn’t have bones yet because I left rigging for the very end phase of the whole project.


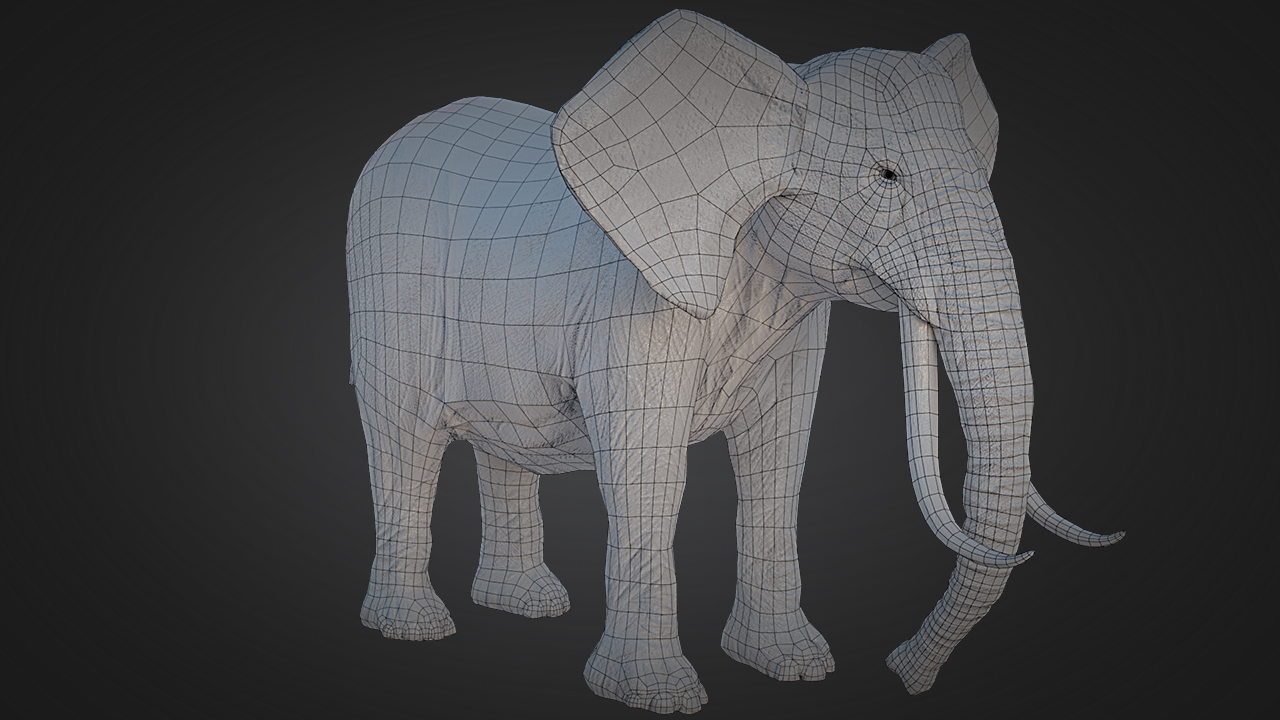
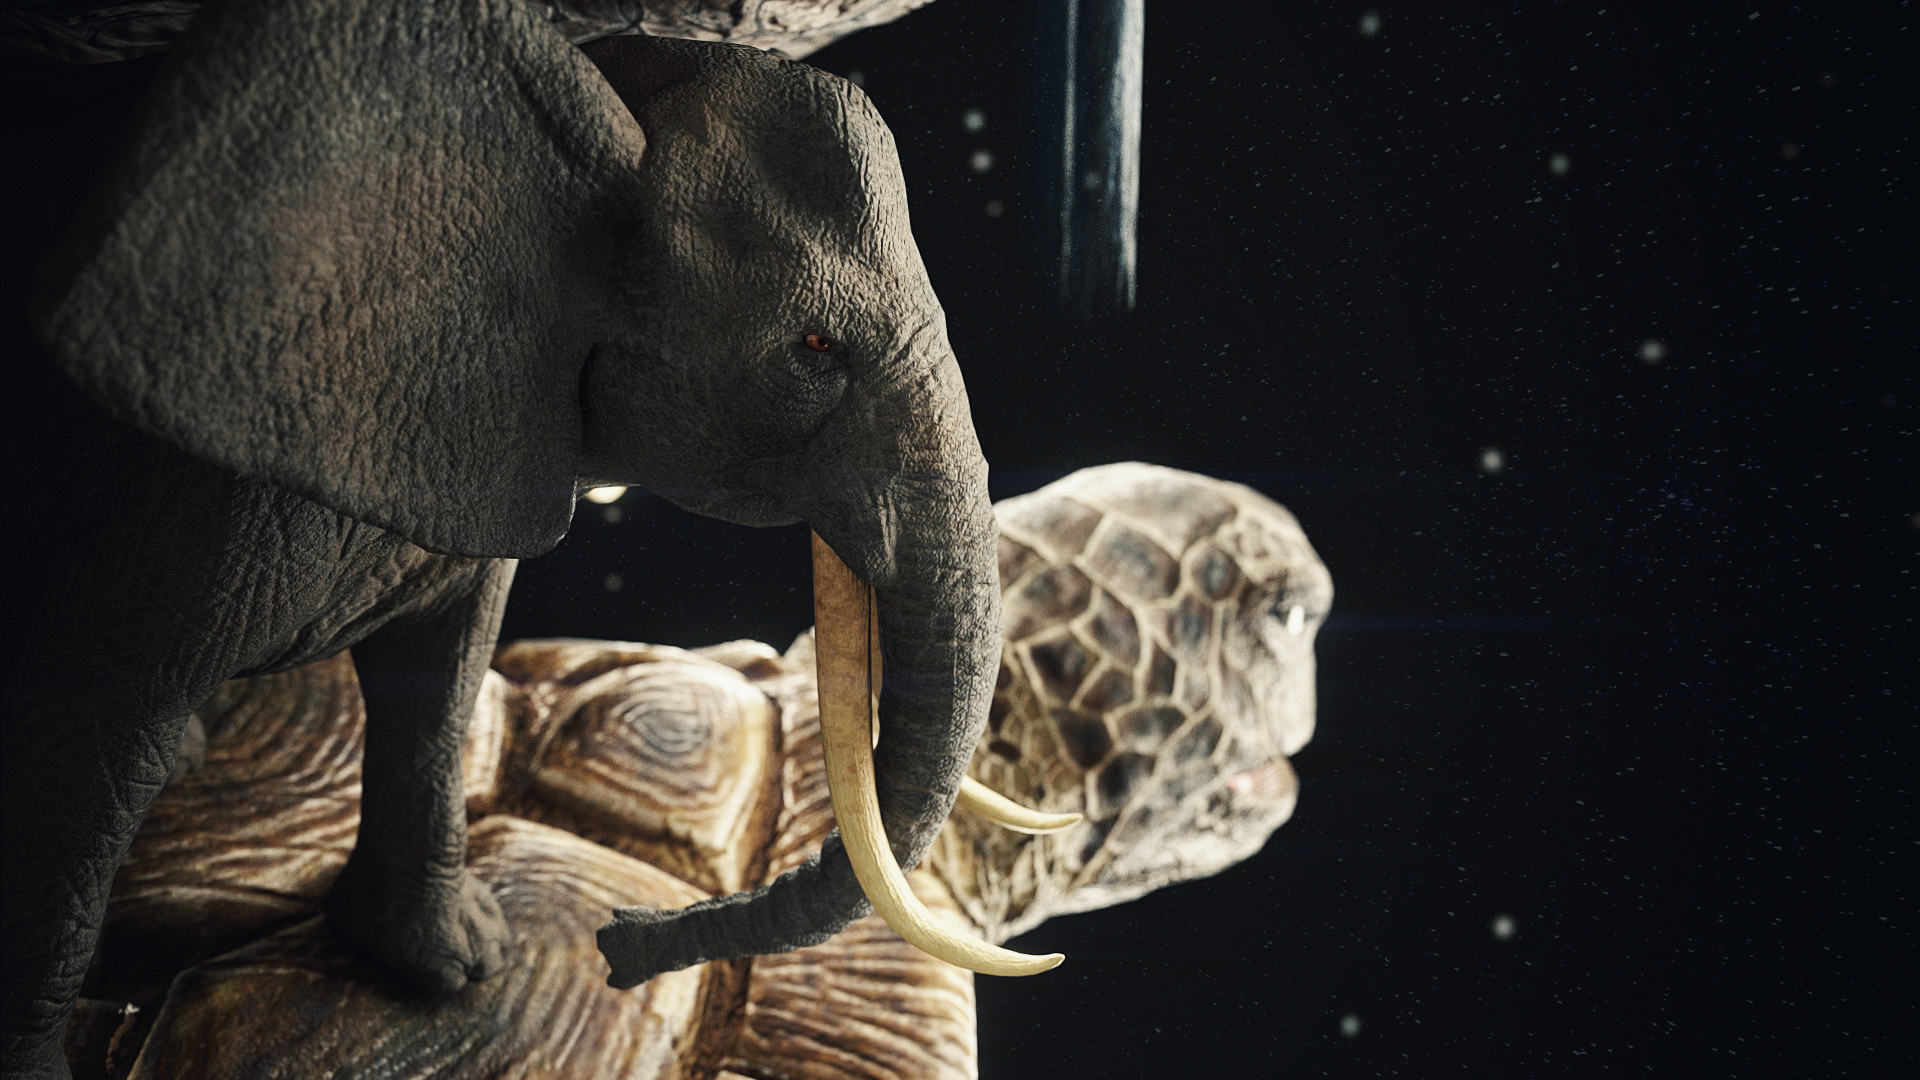
Beril, Tubul, Great T’Phon and Jerakeen…
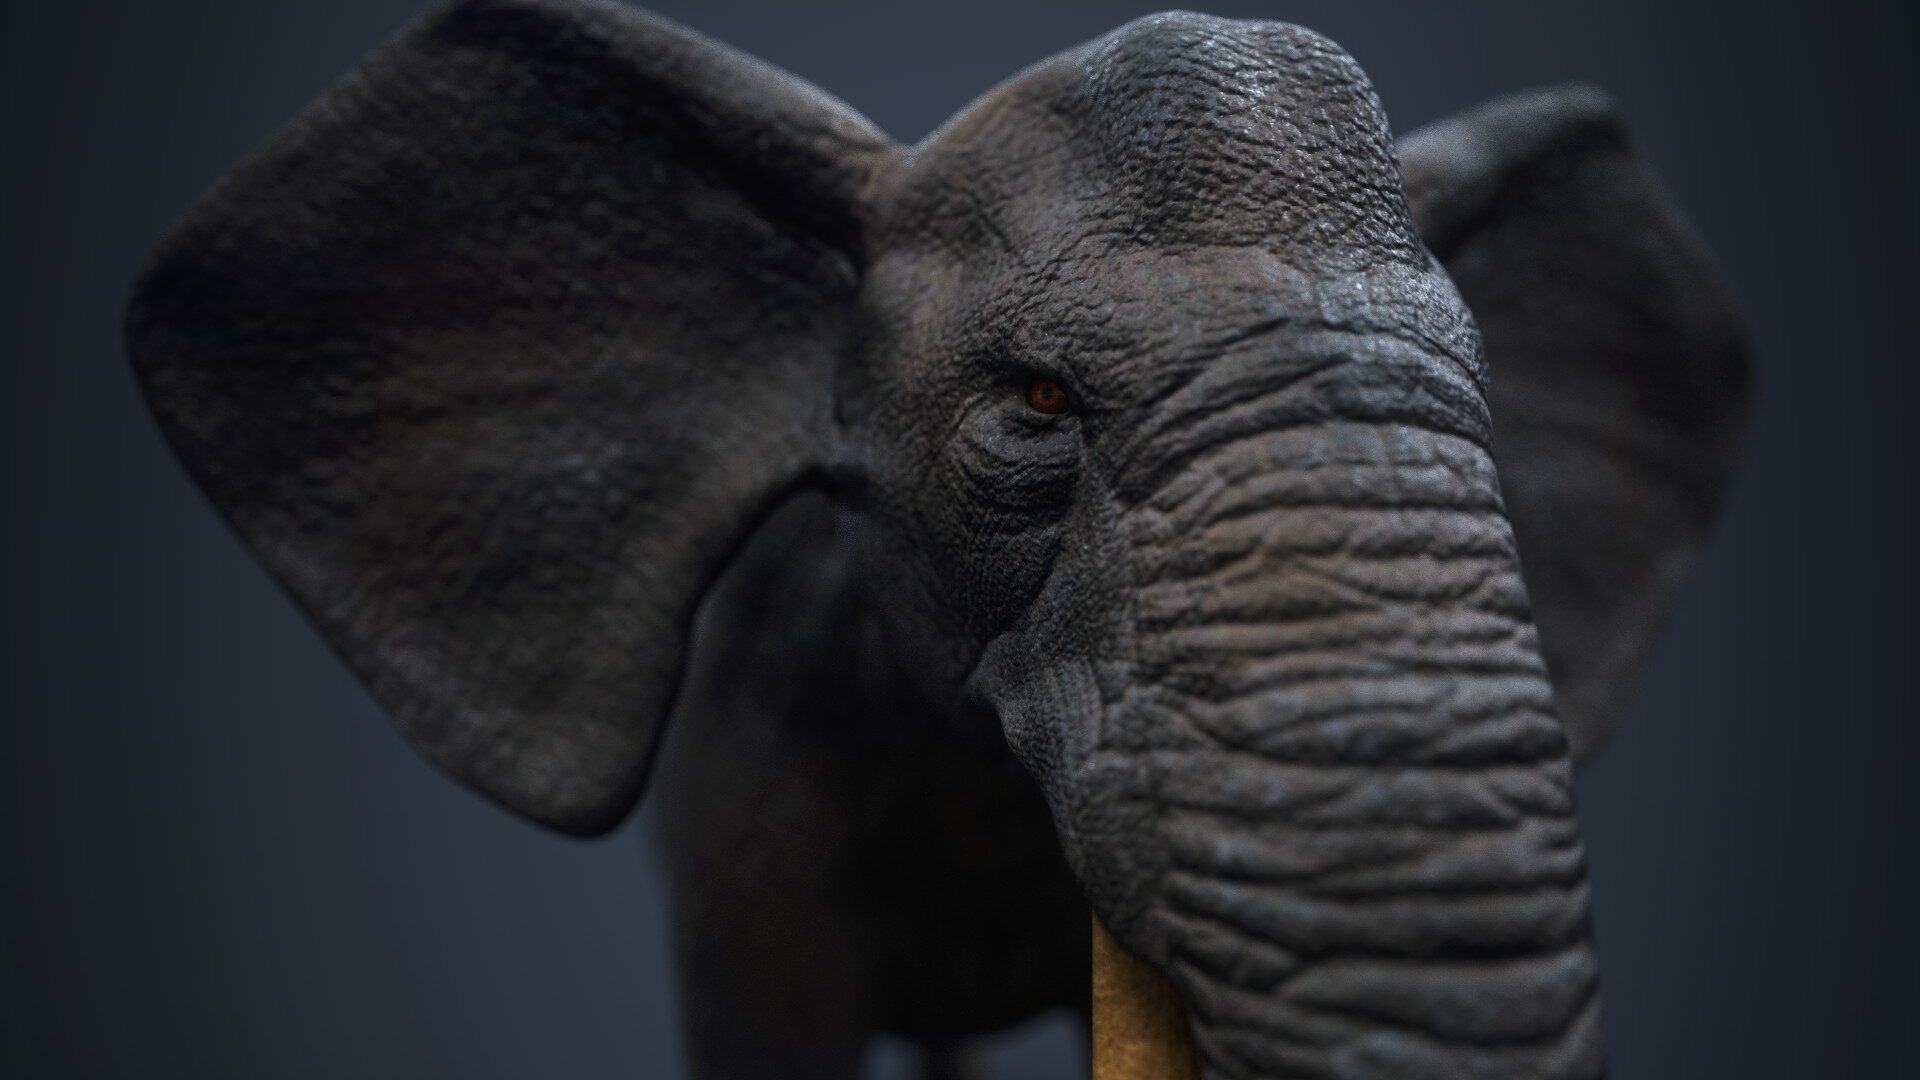
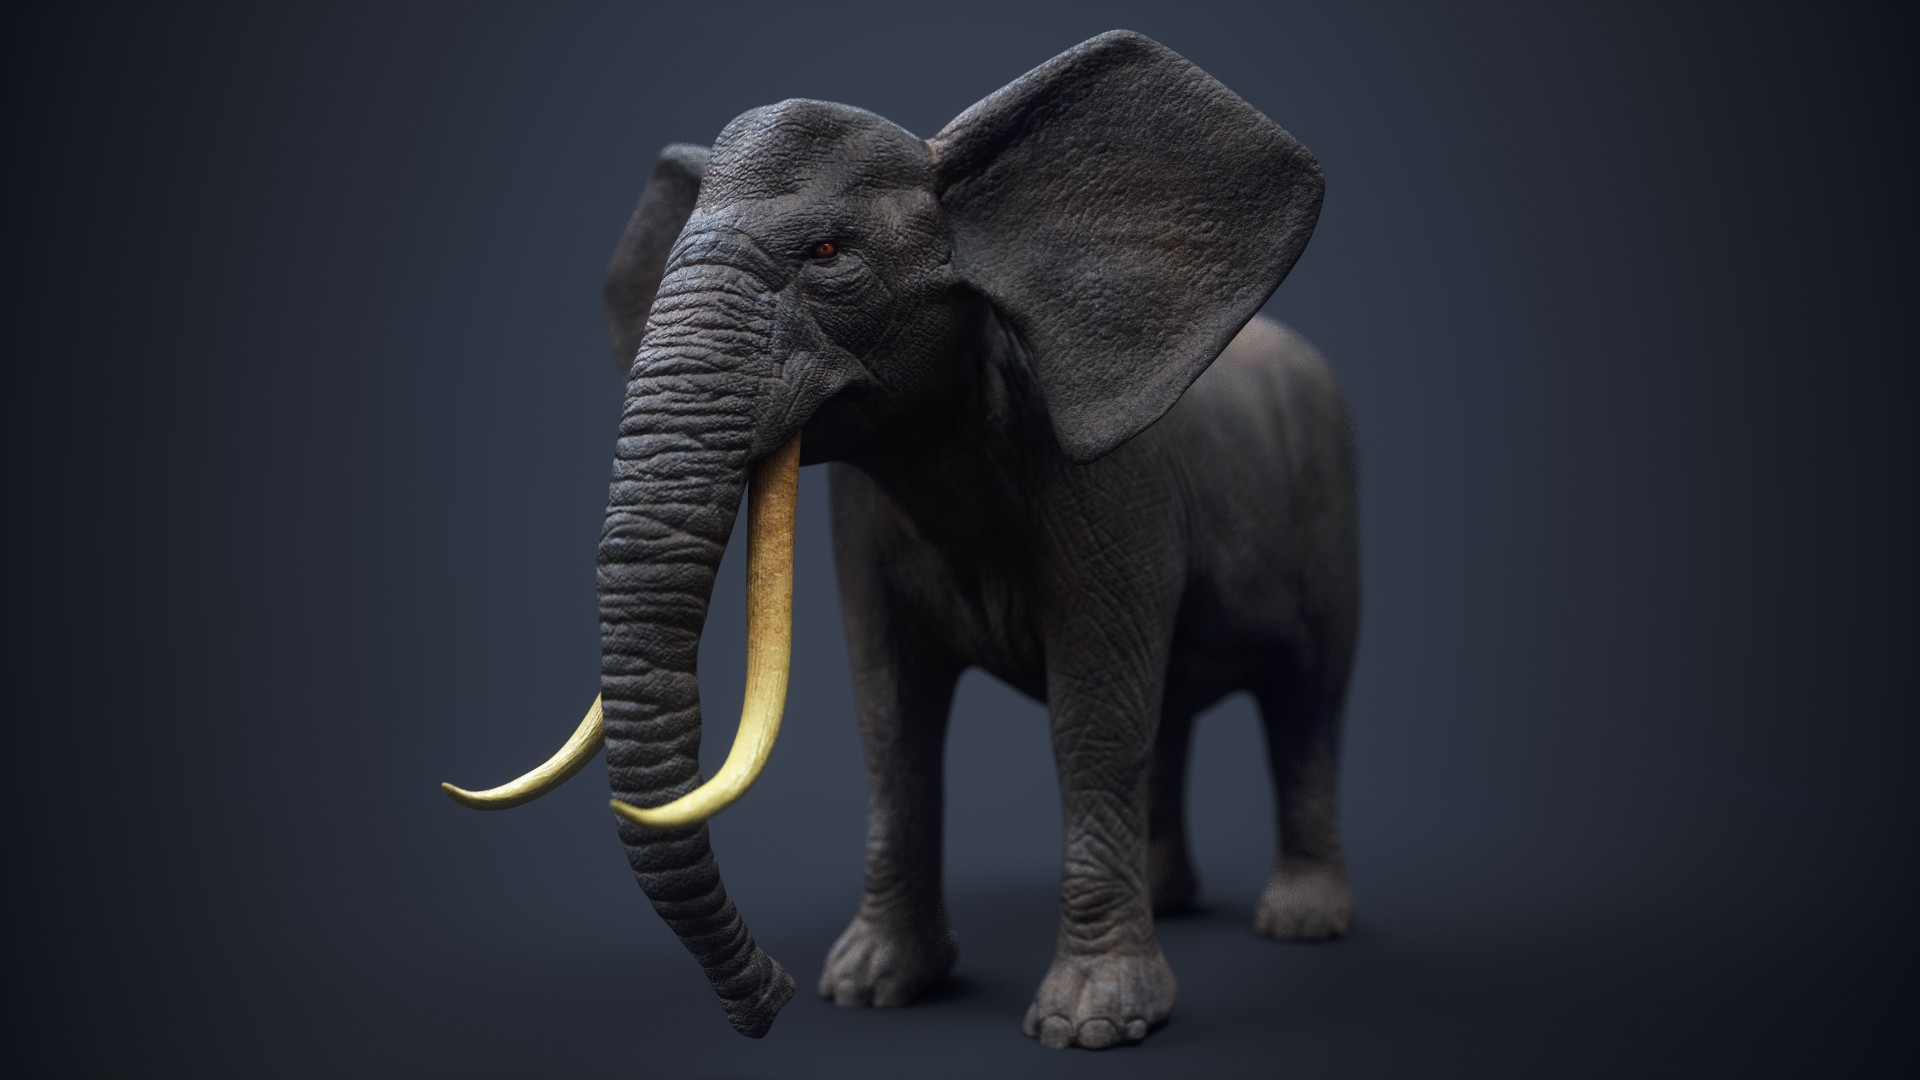
Well, of course it’s the same model. Elephant was created much faster than the turtle because I started right in ZBrush. I figured that base mesh wasn’t that much helpful in the first place. I sculpted it using the same workflow as the previous model, with differences at late stage- I’ve used a bit more alpha textures. Elephants’ skin is more subtle than a turtle, so I didn’t need to carve every pore one by one.
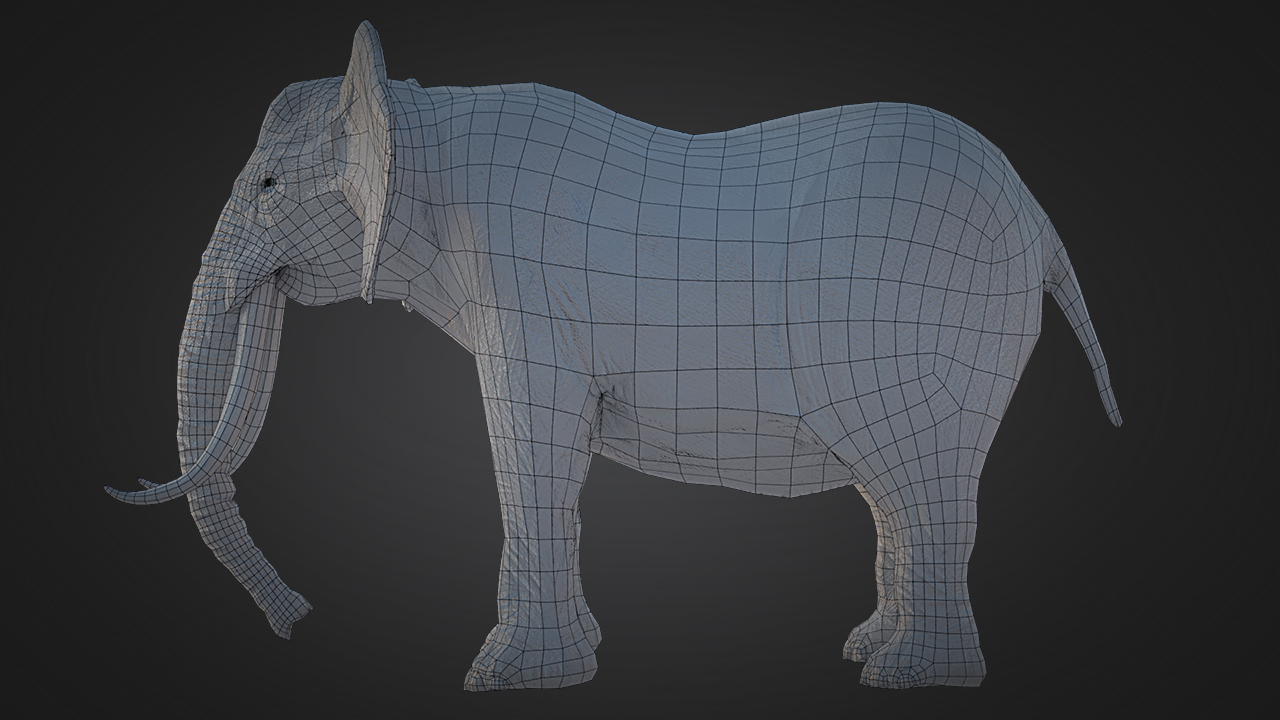
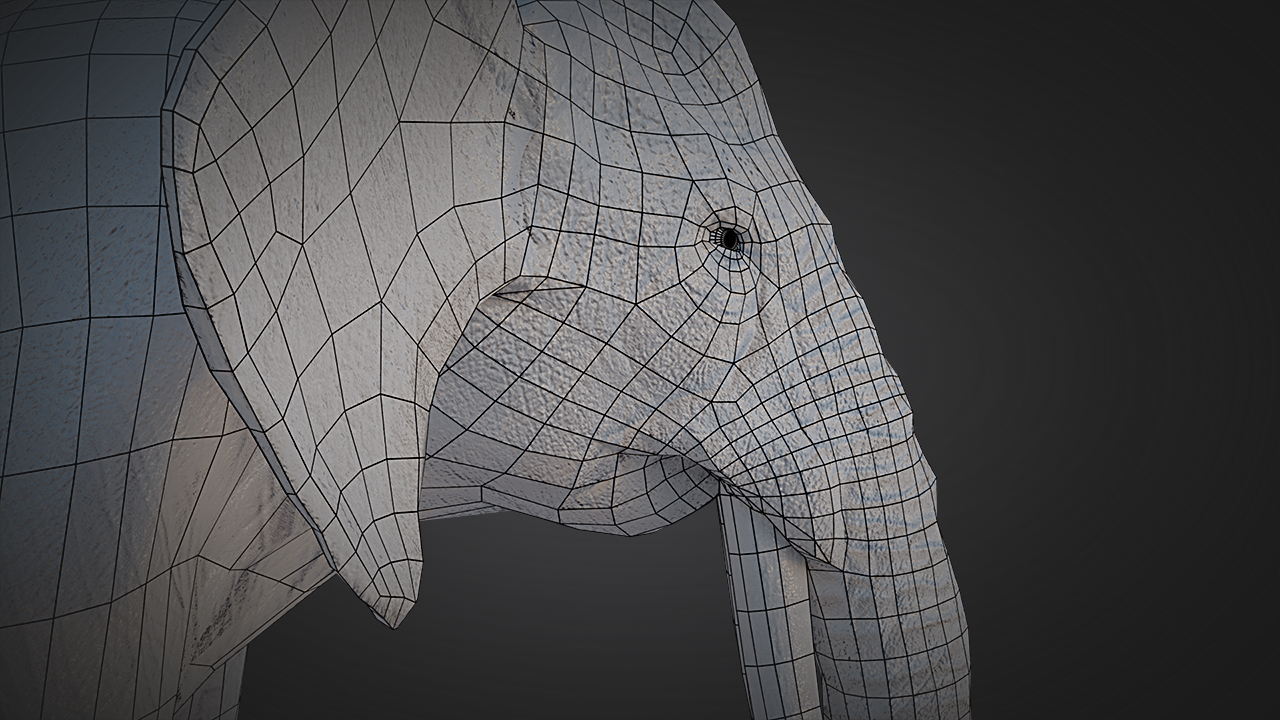
For retopology I wanted to test out Autodesk Maya, and it was quite fun. Quad Draw is so far my favorite tool for that. It was very pleasant to use, even though I’ve worked in Maya for the very first time.
Texturing was also finished much faster than with the previous model. After reviewing references, I noticed that elephant has less subtle details. I’ve used skin of a rhino as a base material, then added some discolorations, but had to have in mind not to over-paint it. You may think that elephants are just one big gray mess, but the truth is that there are plenty of color variations. It pays of to look for it on your references every time you think that your textures looks boring.

The Disc
While creating animals, at the back of my head I was continuously thinking about something else. How on earth am I going to sculpt a whole world? I knew that one day I would have to do it. To reconstruct a believable terrain is a real pickle. Of course, I had a map, so I started outlining it in Blender. So far, so good. My ugly full of ngons mesh was triangulated and exported to ZBrush where I could shape basic mountains and valleys, but deep inside I knew it’s not enough to get a satisfying good-looking environment. I downloaded real-world height information from terrain.party, and did height maps to use in ZBrush for more detailed sculpt. Most maps that I used were picked from Great Canyon and Nevada desert. In the meantime, I started to worry, how am I going to texture all this…
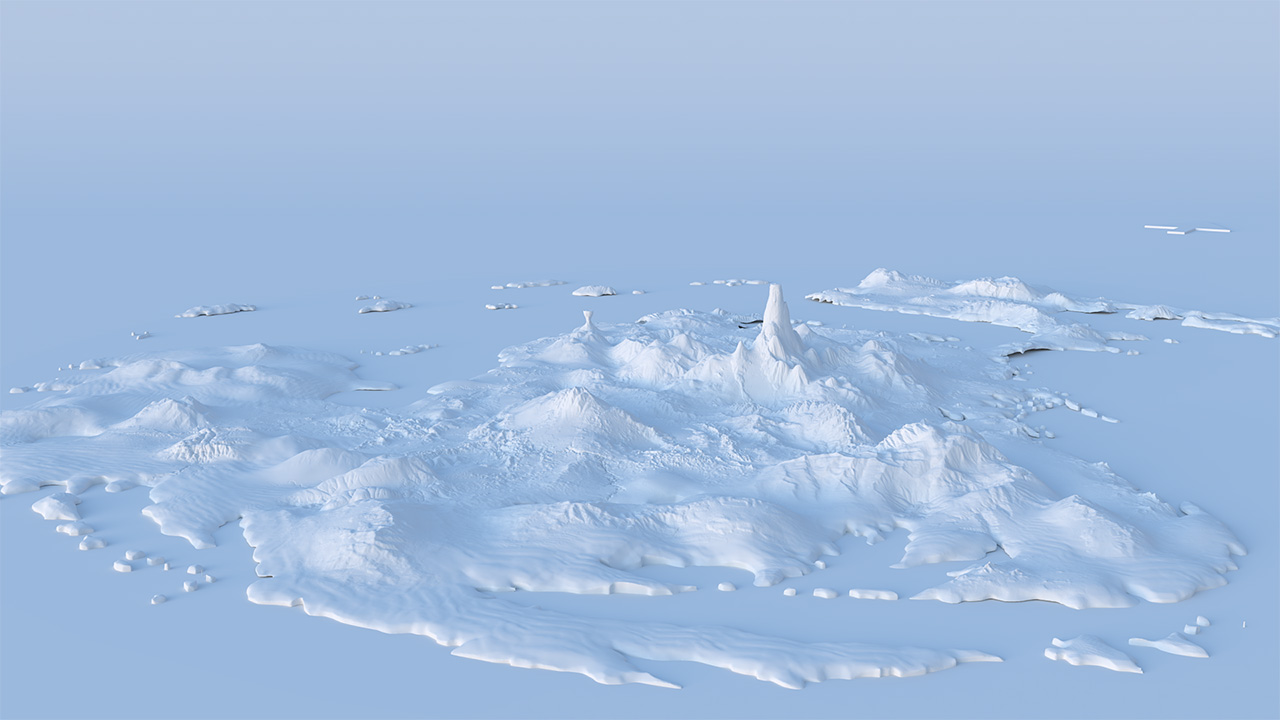
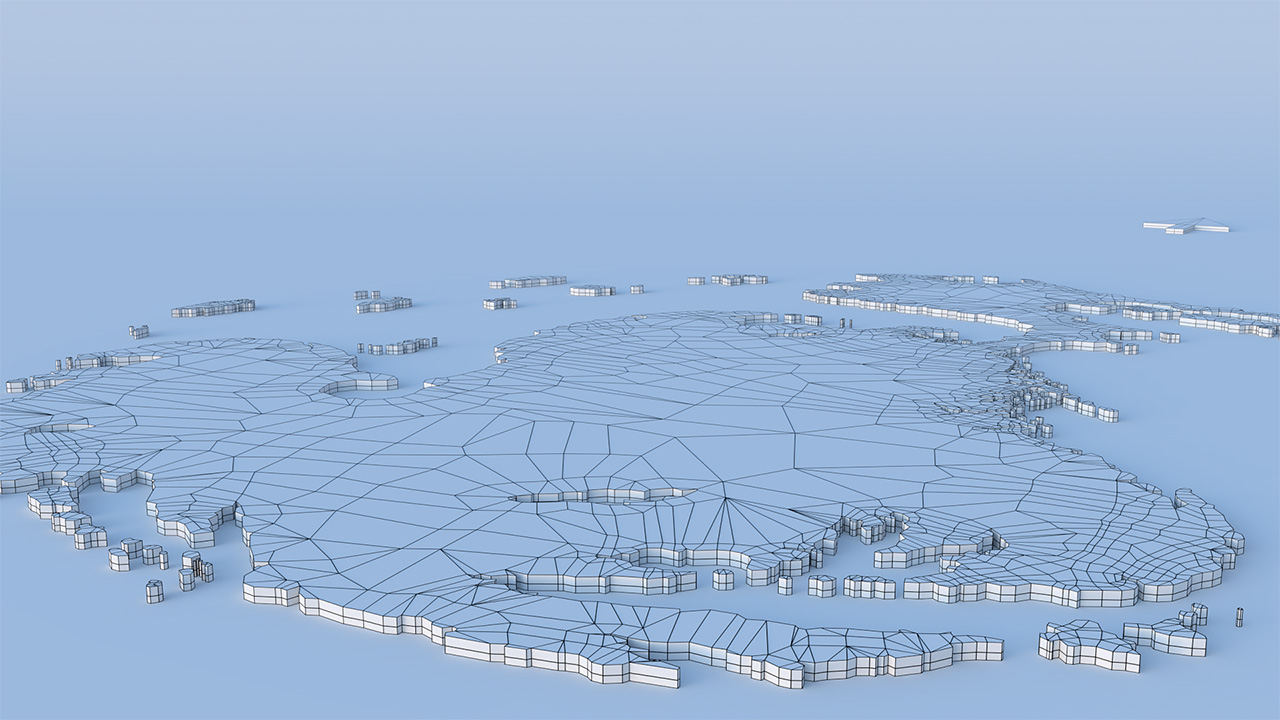
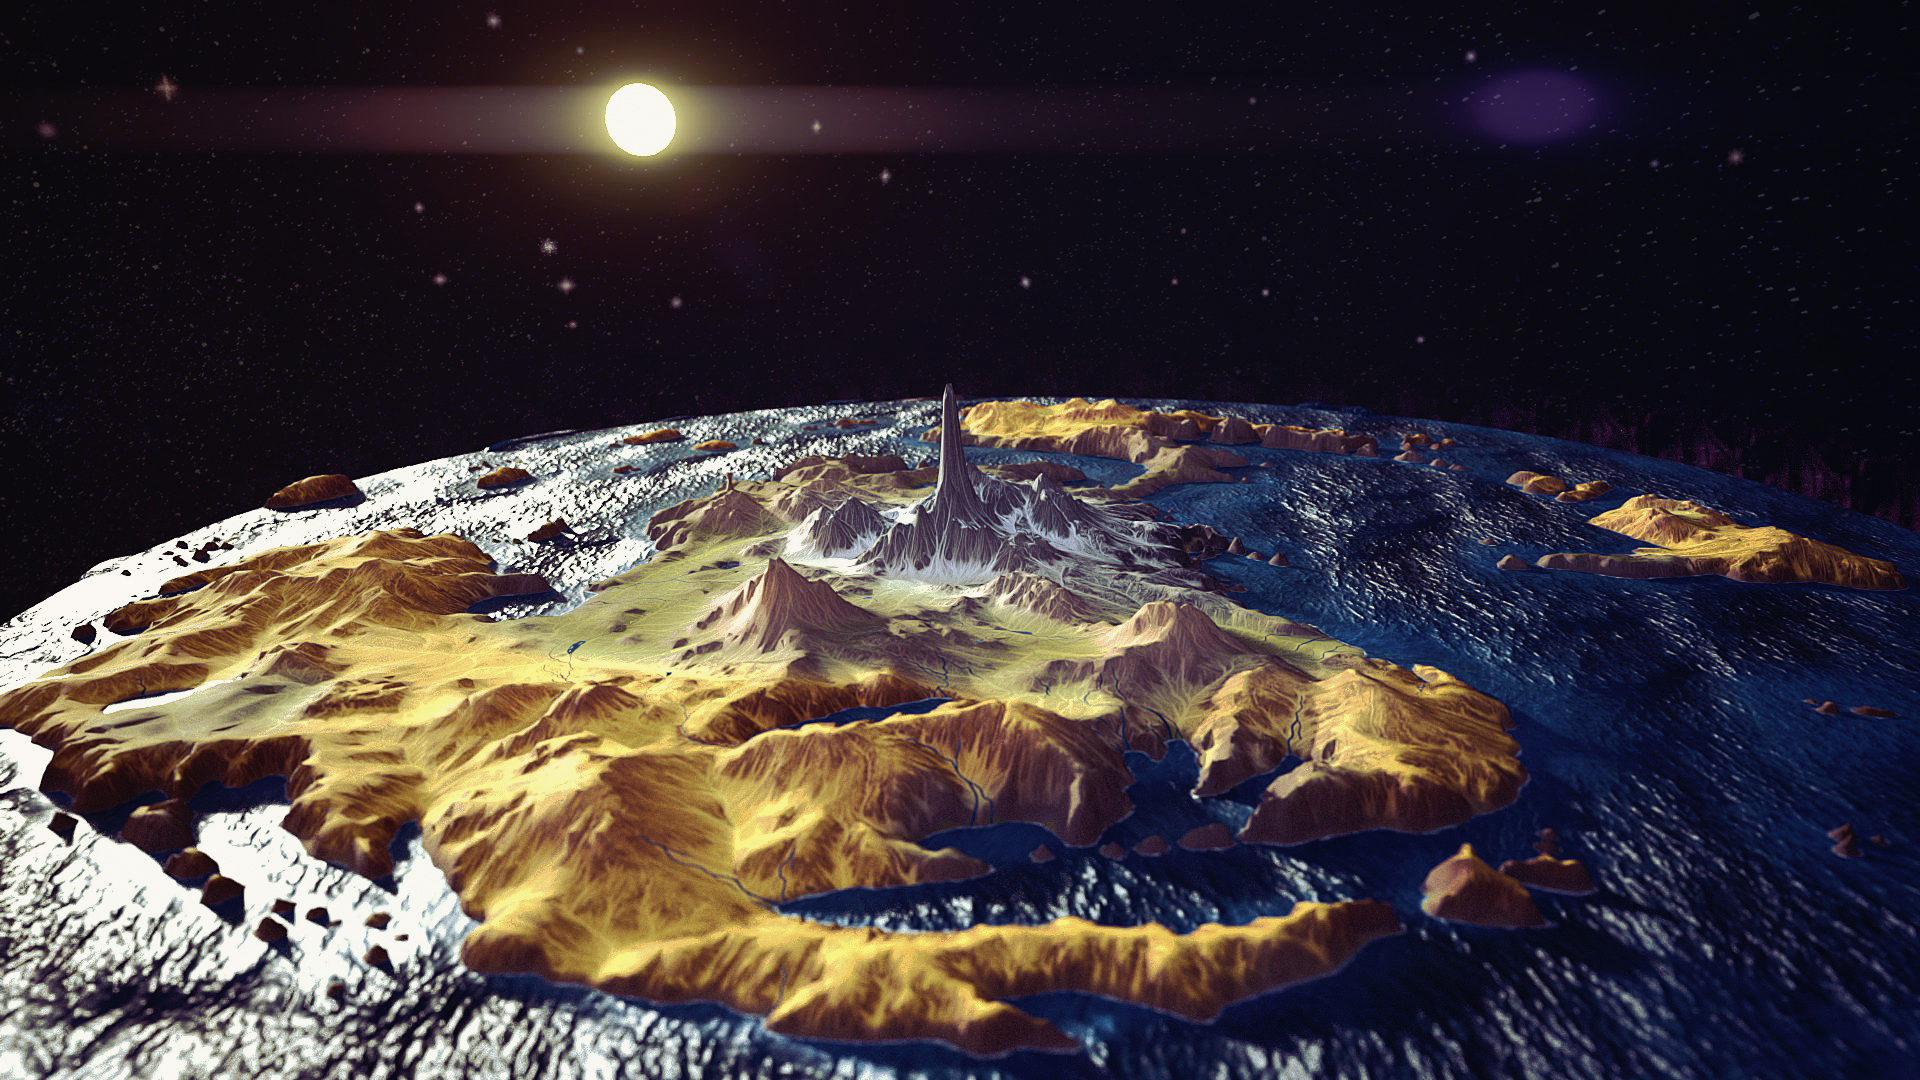
My worrying didn’t have a chance to develop properly because I got in my hands a certain software. A secret weapon for terrain generation. In ZBrush I generated a 8k height map from sculpted environment, which served me as a base in World Machine. Using just few nodes I was able to generate geometry of my world and really great textures. Geometry was extremely inefficient, so I had to optimize it. Retopology seemed madness to me, so I simply decimated it in Blender. If I’d do this today, I would probably get rid of small islands from the height map and recreate them later, based on texture from another part – this would also increase the quality of texture itself. I must admit that some of those islands have horrifying geometry. I still have nightmares with them in it from time to time. Water was painted in Substance Painter.
Rigging and animation
We have all the elements necessary to bring Discworld to life. To do this, I’ve created separated rigs for turtle and elephant. Then I merge them in one file and copied elephant three times and connected all rigs for one master bone (each time I had to rename bones so mesh could stay in right place). After I connected last piece, I started animating. I was aiming to catch subtle movement of dignified turtle swimming through the endlessness of the universe, and four elephants bearings weight of the world on its back. I hope it worked well.
Is that all?
My next step was to create the city of Ankh Morpork. I did tower of Unseen University, walls, several simplified houses. I also created palace of gods on Cori Celesti… but wait. Where is any of those? I’ve decided that I should cut the project at this point. If I wanted to create all of this, I would have to create some characteristic points in every corner of a map. I decided that I am happy with the current level of detail. I’ve chosen minimalism when talking about the Disc. All of that small obstacles on the surface could generate unnecessary noise and I wanted to avoid that. The Sun and the Moon were added as a final touch. After that, it seemed appropriate to add also stars. In general, I am happy with results. I’ve learned a lot from this project. If I had to sum the time I spent on this scene, it would look somewhat like this:
- 30 hours for turtle. There was huge amount of trial-and-error. Mostly error.
- 10 hours for elephant. I’ve a lot on previous errors.
- 8 hours for environment. World Machine is incredible.
- 8 hours for finalizing everything. Putting rig together, animating, tweaking, publishing scene on Sketchfab.
We can round it up to 60 hours in total. In the end of this project summary you can see some renders from Substance Painter.
This project is also published on Artstation.

0 Comments